Lessons in Strifeshadow
|
Vaevictis666
(Dark Elves)
vs
(Dark Elves) TheSparky
on
Forest of Colors

|
This was a real game, my third, and I'm
going to use it to both introduce people to
Strifeshadow, the new game being produced by Ethermoon
Entertainment, which is currently in Beta, and to
provide a little bit of instruction in the form of
pointers to all the testers out there... If you have it
now I'd expect the few pointers to be something you
already know, but they should be handy for people
getting added to the beta after the EM crew gets back
from the IGF. (And Good Luck guys) To TheSparky, good
game man, hope you don't mind me using it for the
report. A few mistakes on my part and it would've been a
heck of a lot closer. To all others, This isn't going to
be a super-quality report, not even an animated GIF to
be seen ('cause I can't replay anymore now that I've
patched it ;) so you'll need to wait until the really
talented people, like GRB, who I've seen around, stop
playing and start reporting! Come on guys, let's see
what you can do! Let's see some more quality stuff like
YRM puts out, I know this doesn't really count, but I
don't quite have all the time I'd like at the moment
;)
- Vaevictis666
Note: If you have problems with the
images, try refreshing the page - all links _should_ be
good...
The game starts out simply enough,
myself (Vaevictis) in the lower
right with a three tower build, and Sparky in the top right with a three
tower build as well. The three tower build seems to do
well, though speed is key. 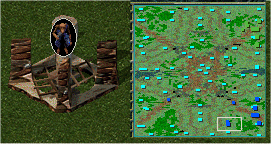 The above minimap is of the game 30 seconds
in, where I have all three of
my towers building, where sparky
has but one. He caught up quickly, though, starting
his third by 1:17. However, by
1:29 I had all mine built, and
was working on my (Ar)Ikon Mine,
scouting, and waiting for the next 90 Aether I would need for my workshop. Scouting started towards
the left, and proceeded clockwise. By 2:10, my scouting kobold was heading north,
my mine was complete, and my Gremlin Workshop was building. 2:13
has Sparky building his Gremlin Workshop, but without a
Mine, and having about 200 Aether less than me. The above minimap is of the game 30 seconds
in, where I have all three of
my towers building, where sparky
has but one. He caught up quickly, though, starting
his third by 1:17. However, by
1:29 I had all mine built, and
was working on my (Ar)Ikon Mine,
scouting, and waiting for the next 90 Aether I would need for my workshop. Scouting started towards
the left, and proceeded clockwise. By 2:10, my scouting kobold was heading north,
my mine was complete, and my Gremlin Workshop was building. 2:13
has Sparky building his Gremlin Workshop, but without a
Mine, and having about 200 Aether less than me.
 At this point, Sparky appears to have told his Kobolds to all work on the
workshop. It's not bad here, because they have nothing
really better to do, but only one worker per building.
And only for the Dark Elves. Accursed warp in all their
buildings, and the Sylvans plant them. Except for Sylvan
Weatherstones (as of Beta 1.1) all buildings built by
Accursed and Sylvans do not need the worker to remain
while it builds. Dark Elves do though. At this point, Sparky appears to have told his Kobolds to all work on the
workshop. It's not bad here, because they have nothing
really better to do, but only one worker per building.
And only for the Dark Elves. Accursed warp in all their
buildings, and the Sylvans plant them. Except for Sylvan
Weatherstones (as of Beta 1.1) all buildings built by
Accursed and Sylvans do not need the worker to remain
while it builds. Dark Elves do though.
3:23 has my
Workshop complete, and me
beginning the production of two Gremlin Carvers. My
scouting kobold is also heading towards the Northeast
corner, where Sparky is hiding.
He is making what is the first real mistake of the game,
building a second Workshop for his gremlins. 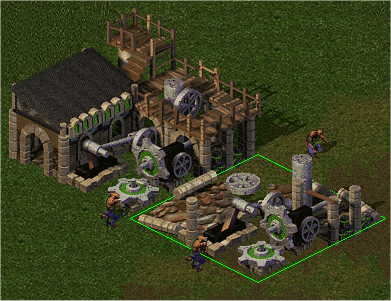 There's a nifty feature for unit production
buildings in Strifeshadow, called upgrading - upgrade
the Workshop, and not only can you queue 4 guys instead
of 2, but it will train 2 units at the same time.
Exactly like having two Workshops, but it saves on
space, and is actually cheaper than the second Workshop.
And hey, some of the production buildings can be dual
upgraded, allowing them to produce 3 units in
parallel. There's a nifty feature for unit production
buildings in Strifeshadow, called upgrading - upgrade
the Workshop, and not only can you queue 4 guys instead
of 2, but it will train 2 units at the same time.
Exactly like having two Workshops, but it saves on
space, and is actually cheaper than the second Workshop.
And hey, some of the production buildings can be dual
upgraded, allowing them to produce 3 units in
parallel.
3:45, Both me
and Sparky get our first
gremlin, work on my Moag Pens
begins. By elimination, I know
where Sparky's base is, and
I plant a spike trap or two
outside the front door. Sparky
decides he's gonna do me one up, and begins construction of
a fourth Aether Tower. 4:15, I
have two spike traps out front of Sparky's base, and he comes out to visit my kobold with a gremlin.

 4:37, Moag Pens complete in my base. Two gremlins guarding the
front door. 5:15, TheSparky
begins work on his (Ar)Ikon
Mine. 6:00 - 5 Gremlins on the move north. Behold this
one in all it's glory as it gets stuck on a tree. It
actually went between them, around the right one, and
then stopped there. Go figure. 6:21, My fourth Aether
Tower completes. TheSparky
currently outresources me 1215
to 510 Aether, but I also have
647 of both Ikon and Arikon. 6:30, TheSparky begins construction of a
Gremlin Turret. 6:40 I add two
more towers to my network,
allowing me to get resources
from 1 more pool. 4:37, Moag Pens complete in my base. Two gremlins guarding the
front door. 5:15, TheSparky
begins work on his (Ar)Ikon
Mine. 6:00 - 5 Gremlins on the move north. Behold this
one in all it's glory as it gets stuck on a tree. It
actually went between them, around the right one, and
then stopped there. Go figure. 6:21, My fourth Aether
Tower completes. TheSparky
currently outresources me 1215
to 510 Aether, but I also have
647 of both Ikon and Arikon. 6:30, TheSparky begins construction of a
Gremlin Turret. 6:40 I add two
more towers to my network,
allowing me to get resources
from 1 more pool.
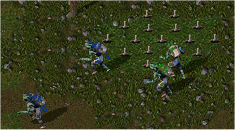 6:55: Combat begins. Two of Sparky's Carvers come out to visit.
Only two of mine are up by his
base entrance, the other three being about a screen
below it. 6:55: Combat begins. Two of Sparky's Carvers come out to visit.
Only two of mine are up by his
base entrance, the other three being about a screen
below it.  His Carvers are kind enough to visit my spike traps before entering combat,
and my other three quickly rush
to the scene. End result: I
don't lose any Carvers, Sparky
loses both of his. His Carvers are kind enough to visit my spike traps before entering combat,
and my other three quickly rush
to the scene. End result: I
don't lose any Carvers, Sparky
loses both of his.
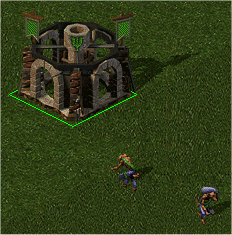 Now we come the the next difference between
Strifeshadow and Starcraft. Mining. See here two kobolds
and a mine. One going to, the other from. Simply put,
this is a waste. In Starcraft, Vespene (the closest
harvesting analogy) didn't produce itself unless a peon
was there, so it is advantageous to keep one in there at
all times. In Strifeshadow, Ikon/Arikon Mines produce
constantly. When a worker enters, they grab all that is
available and bring it back. And them workers can carry
a heck of a lot of it, too. Like over 600 units of both
Ikon and Arikon (from a dual-purpose mine, like the one
on the left) in just one trip. So unless your workers
need to travel more than 4 or 5 screen widths, there's
no real improvement with multiple workers. It's either
200 every 5 seconds, or 400 every 10 seconds. Take your
pick. Now we come the the next difference between
Strifeshadow and Starcraft. Mining. See here two kobolds
and a mine. One going to, the other from. Simply put,
this is a waste. In Starcraft, Vespene (the closest
harvesting analogy) didn't produce itself unless a peon
was there, so it is advantageous to keep one in there at
all times. In Strifeshadow, Ikon/Arikon Mines produce
constantly. When a worker enters, they grab all that is
available and bring it back. And them workers can carry
a heck of a lot of it, too. Like over 600 units of both
Ikon and Arikon (from a dual-purpose mine, like the one
on the left) in just one trip. So unless your workers
need to travel more than 4 or 5 screen widths, there's
no real improvement with multiple workers. It's either
200 every 5 seconds, or 400 every 10 seconds. Take your
pick.
 But back to the game. The time is 7:23, and
Sparky's scouting Kobold enters
my base. I have no troops. He takes a few shots
at my Moag pens before heading
toward my Outpost. 7:31, my Carvers are ignoring the threat in
my base as I build both a Carver and a Moor Moag
there. So they head into Sparky's base. For reference, 5
Carvers kill one Kobold very quickly. However, killing
the Kobold takes long enough that Sparky's Gremlin Turret is able to
kill one of my Carvers. Them
turrets are just downright evil. 7:41, my four carvers are taking on Sparky's mine, which has been
converted to Ikon production only. But back to the game. The time is 7:23, and
Sparky's scouting Kobold enters
my base. I have no troops. He takes a few shots
at my Moag pens before heading
toward my Outpost. 7:31, my Carvers are ignoring the threat in
my base as I build both a Carver and a Moor Moag
there. So they head into Sparky's base. For reference, 5
Carvers kill one Kobold very quickly. However, killing
the Kobold takes long enough that Sparky's Gremlin Turret is able to
kill one of my Carvers. Them
turrets are just downright evil. 7:41, my four carvers are taking on Sparky's mine, which has been
converted to Ikon production only.
7:50, mine dies to 4 Carvers. 8:05,
Moag and Carver finish in my
base.  8:17, my carvers
sneak to the rear of Sparky's
base and assassinate an Aether tower, blocking
harvesting from the pool it was beside, and the tower
that was feeding into it. 8:30, my Moag and Carver kill the threat in
my base. Sparky comes at my 4 Carvers with 2 of his own, and attempts to lure me towards his bad-ass Turret. Look at me chasing him ;) 8:17, my carvers
sneak to the rear of Sparky's
base and assassinate an Aether tower, blocking
harvesting from the pool it was beside, and the tower
that was feeding into it. 8:30, my Moag and Carver kill the threat in
my base. Sparky comes at my 4 Carvers with 2 of his own, and attempts to lure me towards his bad-ass Turret. Look at me chasing him ;)
  9:00, Sparky now has
equal numbers of Carvers at his
base, so I back off to my spike traps. 9:40, my Moag upgrade is complete, allowing
my Carvers to mount the Moags
and produce Moag Raiders, a quick, damaging, ranged
unit. 9:00, Sparky now has
equal numbers of Carvers at his
base, so I back off to my spike traps. 9:40, my Moag upgrade is complete, allowing
my Carvers to mount the Moags
and produce Moag Raiders, a quick, damaging, ranged
unit.
10:15. Things have been quiet. Then
Sparky attacks my position at his base entrance.  In the lower left, you can see my Raider and a spare Moag, In the lower left, you can see my Raider and a spare Moag, 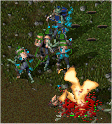 and the results of that battle cause Sparky's 6 Carvers to flee from my 3 Carvers and a Raider. 10:50,
he comes at me again, but by now I've mounted my spare Moag. By 11:05, we've both
lost a Gremlin, and I'm trying
hard to keep my Raiders away
from Sparky's Carvers so they
can stay alive. It didn't work. That explosion on the
right is one of mine. and the results of that battle cause Sparky's 6 Carvers to flee from my 3 Carvers and a Raider. 10:50,
he comes at me again, but by now I've mounted my spare Moag. By 11:05, we've both
lost a Gremlin, and I'm trying
hard to keep my Raiders away
from Sparky's Carvers so they
can stay alive. It didn't work. That explosion on the
right is one of mine.
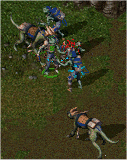 11:20, Sparky's
remaining 3 Carvers head towards my base, and I
kill one that gets distracted. My remaining Carver and
Raider remain at his base.
11:31, a kobold outside of my
base gets smoked rather quickly by Sparky's Carvers. 11:45, Sparky's two Carvers run into two of
my Carvers and two Moags as
well. Long story short, un-injured units hose previously
injured units. At this point, things are pretty much
entering the end-game. My carvers mount up and head
north along with an extra Moag for my spare northern Carver. Behold the
evilness that is ranged units which shoot lightning.
They are currently re-crippling Sparky's Ikon production (Notice the
I on the mine, signifying singular Ikon production.
Mixed production produces Ikon and Arikon at 40% the
rate of an exclusive mine.) 11:20, Sparky's
remaining 3 Carvers head towards my base, and I
kill one that gets distracted. My remaining Carver and
Raider remain at his base.
11:31, a kobold outside of my
base gets smoked rather quickly by Sparky's Carvers. 11:45, Sparky's two Carvers run into two of
my Carvers and two Moags as
well. Long story short, un-injured units hose previously
injured units. At this point, things are pretty much
entering the end-game. My carvers mount up and head
north along with an extra Moag for my spare northern Carver. Behold the
evilness that is ranged units which shoot lightning.
They are currently re-crippling Sparky's Ikon production (Notice the
I on the mine, signifying singular Ikon production.
Mixed production produces Ikon and Arikon at 40% the
rate of an exclusive mine.)
 That mine dies a horrible defeat at 13:56
elapsed game time. This is followed shortly by the
destruction of his Gremlin
Furnace (allows production of Grenadiers) and some
Aether Towers, before I started
getting hit at by that Turret from way back when... As
is known to happen, my four
Raiders defeated the turret, but not before the rapid
application of 10 damage a pop shots killed one of the
Raiders. RIP, 16:09. That mine dies a horrible defeat at 13:56
elapsed game time. This is followed shortly by the
destruction of his Gremlin
Furnace (allows production of Grenadiers) and some
Aether Towers, before I started
getting hit at by that Turret from way back when... As
is known to happen, my four
Raiders defeated the turret, but not before the rapid
application of 10 damage a pop shots killed one of the
Raiders. RIP, 16:09.

16:24, having lost all his units and having my units pound on his Dark Elven Outpost, TheSparky concedes the match. Good
Game.
Well, there it is, maybe not the first
period, but hopefully the first of many StrifeShadow
reports by me. And maybe next time I'll even do a
collage or animated gif or something ;). I'd post the
replay here, but it's a Beta 0 game (ie before Beta
Patch 1) so it's not like you could play it without a
bunch of trouble ;) I wish all testers good luck in
games, and may you avoid really nasty crash bugs and all
that jazz ;)
- Vaevictis666
Oh, and next time I'll try and put a
bit more care into player name colors and such, right
now I just did a nice quick Global Replace because I'm
tired and I want this out before I go to
bed... |
 Home
Forum
Starcraft Tournaments
Home
Forum
Starcraft Tournaments


