The Jedi Academy Report: part 2
If you missed part 1,
go here to see it
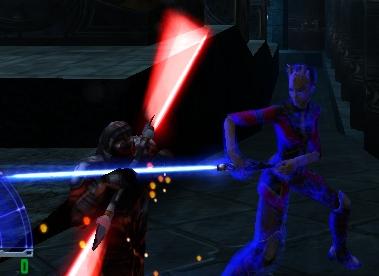
Let’s get back into the action. Part 1 ended with Jaden Kor returning to the
Jedi Temple on Yavin IV to receive a special mission from Luke Skywalker. Luke gathers
all the Jedi together and reveals that the scepter that was seen in the opening sequence
of the game is being used to drain Force energy from locations so that it all may be
stored and released later for some unknown (but clearly, evil) purpose. Luke then
assigns all the Jedi to different locations to see if the force power has been drained
from them. I have been assigned to go to Hoth to investigate alone.
Before I take off, Luke and I get some one on one time, and he critiques my force
power choices. Since I have three points in lightning and one point in each heal and
mind trick, I am leaning toward the dark side, and he warns me that I am on a dangerous
path.
The Ice planet, Hoth
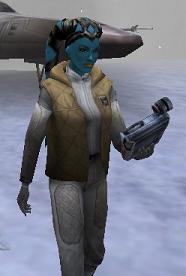
So I set out, dressed in my sleek and stylish cold weather garb, and land near the
cave where Luke saw Obi Wan Kenobi. Reaching out with the Force, I feel nothing
unusual, but I do spot a blinking light up ahead. Ducking back into a cave behind my
ship I see a few tauntuns, and deeper in the cave there is a wampa who is not happy to
see me. He takes a few swipes at me, and eventually grabs me by the legs, giving me a
convenient location from which to slice his arm completely off.
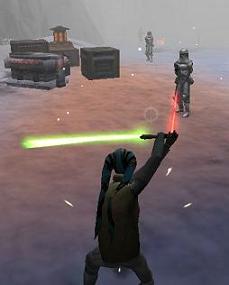
I hop on the back of one of the unsaddled tauntuns and name him Bjork. Bjork and I
get along well as we move out to inspect the blinking light. All is well until we are
fired upon by a snowtrooper, (the ones that attacked Hoth in Empire Strikes Back) and
poor Bjork is so confused that I have to leap off his back to slice all the troopers
into little pieces. At that point I promptly forgot all about Bjork, it would just
never work between us (he was so insignificant that he doesn’t even get a screenshot).
As I move ahead past the makeshift imperial camp there is another cave with yet
another angry wampa creature. This one also tries to eat me, and I finish him off in a
similar fashion to the first. As I emerge from the cave, there are some blips in the
snow up ahead, so I pull out the Tenloss rifle to see what they are. It is another
small snowtrooper camp, but this camp is guarding an entrance into Hoth’s famed Echo
base.
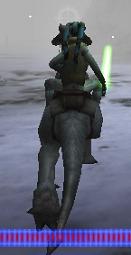
Unfortunately this entrance is sealed up tight, and not even my lightsaber will
penetrate the thick doors. So I mount up one of the saddled tauntuns that the
snowtroopers may have been using to survey the nearby area, and follow the beacons.
This tauntun doesn’t get a name, he has been processed and become a number and probably
has a bar code on him somewhere, and I ditch him as soon as we find some more
snowtroopers that fire upon us.
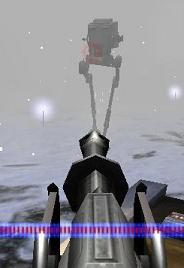
I appear to be in a wreck yard from the battle of Hoth, but the troopers have
entrenched themselves in, as one of the troopers, upon seeing me heads for a mounted
gun, but he is shocked to death before he can get to it. Then I hear them, heavy metal
steps thudding across the snowy landscape. An imperial AT-ST walker (the two-legged
variety) is heading straight for me, I grab the mounted gun and aim it at the walker and
let loose before it can get a good lock and turn me into a piece of Swiss cheese.
Fortunately this one went down quickly, if that deck gun had not been there, this would
have been a tough fight.
Moving on, there is a perimeter guard post that was used by Echo base, but the
imperials have taken over and locked the door; however the snow has piled deep on the
left side allowing me to climb over the wall and greet the two snowtroopers and probe
droid that are inside the enclosure and guarding the pass to the other side of Echo
base. Once I clear out that resistance, I enter a building that guards the pass, and
even perhaps a few other things.
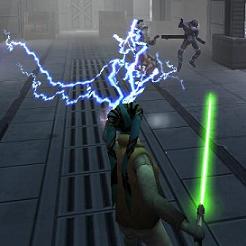
As I enter the building I come to a room with two lifts, one going up and the other
down from this level. I opt for the high road, and enter what looks like a control room
guarded by a few snowtroopers and an imperial officer. After shocking them all to
death, I inspect the room, there is a switch that unlocks a door two floors below me,
and one switch that all it seems to do is make a loud noise, that is until I look out
the window and see that it actually activates and fires the Ion Cannon that the
Rebellion left behind. I head back down to the door that I opened below me.
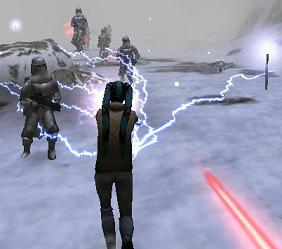
I go down to the lower level, fry the troopers there, pass through a few corridors
and come to a large room with more troopers, and eventually come to a lift that leads me
back outside to the blinding snow. Once outside, I head forward and enter a narrow
canyon blockaded with heavy crates. Advancing a few steps farther down the canyon I
spot a mounted gun. Then, pouring out of the far end of the canyon come 15-20
snowtroopers intent on stopping my heartbeat. I have no heavy weapons on me, but there
is a mounted gun here, and I also know how to produce lightning from my fingertips. So
choosing the latter, I turn off my lightsaber to project lightning over a wider arc, and
increase the damage that it does, allowing me to kill them all faster. The troopers
were quickly cooked and thrown back, littering the canyon. After strafing the line of
troopers twice, they are all taken down.
As I leave the canyon, I come to another wreckage yard littered with pieces of
imperial walkers and live snowtroopers. From the distance, well beyond what I can see,
a mounted gun is firing upon me. I quickly find cover, and moving from cover to cover,
I eventually see the mounted gun sitting on the back of an AT-AT that has been mostly
buried in the snow, and I know I need to take out the trooper before I move on, or else
he can kill me from behind.
The preferred method for taking out a mounted gun is to spiral close to it until you
are close enough to kill the gunner. The guns shoot very quickly and have great range,
but they have a hard time turning to hit a target that moves quickly across the front of
it. That is exactly what I did in this case; I also activated Force Speed to give me a
little edge over the snowtrooper that had me in his sights. And that edge was enough to
get me up close and slice the trooper. A probe droid then floated up to take a few pot
shots at me, but was quickly dispatched by a few clean saber swipes.
Without ever looking back, I moved on to another snowfield littered with wreckage,
but more rebel than imperial. There are destroyed rebel turrets, and even a wasted
shield generator, all from the battle of Hoth. Fighting through this field I eventually
get to another sealed door that would lead into Echo base. Having come to another dead
end I scour the edges of the field and turn up nothing. That means it’s time to
backtrack.
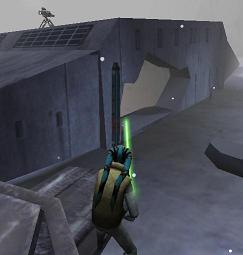
Heading back to the AT-AT with the mounted gun on the back, there is an opening on
the back side (the side I never looked at) that is covered over with a temporary force
field. After cutting down the small unit, I duck inside the back of the wrecked troop
transport to find two snowtroopers and a ladder that leads down. Down the ladder there
are three more snowtroopers guarding a gaping hole, the troopers are fried in short
order, and I drop down the gap.
I drop down to find myself on top of a large (probably 30ft high) cargo crate, and I
can hear snowtroopers chattering down below me. Using Force sight, to spot the
troopers, I whip out some mines that I found on my way in, and drop one down set to
proximity detonation. All three troopers are blasted without them even knowing I was
there.

I find the only unlocked door leading out of the storage area and navigate the
hallways and rooms, slicing and frying troopers who get in my way without much effort
until I come to one long hallway with two troopers and a mounted gun on the far end. I
again activate Force Speed and zigzag up the narrow hallway and get close enough to
shock the troopers and destroy the gun. After that run in, I eventually make my way
into the medical area of Echo base.
As I fight my way through, I eventually come to an elevator that takes me to what
looks like the surgery area in the base. I come to another large room with a deck gun,
so I decide to switch things up, and take control of the gun, and troopers pour out of
the next room, right in front my new toy.
After that fiasco, I follow the hallways and corridors to the control center of the
base. Once I enter, a Sith cultist reports to “Alora” that after scouring the
computers, they discovered that Luke Skywalker went to Dagobah after he left Hoth so
long ago. I advance to challenge the cultist, and he dies after a short, uneventful
battle, he was clearly no match for me.
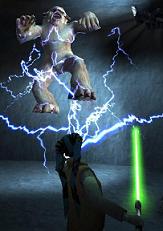
Leaving the command center through the only open hallway on the far side, I stumble
upon another wampa making a meal out of a tauntun. I decide to try and save the poor
loyal creature by attacking the larger predator, and a few saber swipes later (and some
lightning bolts) the wampa is silenced.
Then I come to some large doors that empty out to another cargo area like the one I
dropped into before. Here I meet Alora, who is the same Sith Twi’lek woman who entered
the Jedi temple at the start of the game; she is talking on a com link to report what
she found out while investigating the base, that is, until she spots me, and moves to
attack.
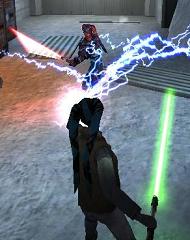
We clash, and the battle rages all over the storage area, over crates and off the
walls. We get into a saber lock that I win, but she gets away before I can deliver a
killing blow. Eventually my lightning gets the best of her and she retreats up crates,
up to some pipes on the ceiling, and out a hole in the roof (Why couldn’t I come in that
way?) and into a ship waiting for her before I can question her.
And with that, I scurry back to the academy to report my findings to Luke and Kyle.
As a reward I am trained in my choice of either fast or strong saber style and advanced
to the rank of apprentice. I choose to learn the strong saber style, so I can deliver
powerful, but slow killing blows that are difficult to block.
Now five more missions are available for me to choose to complete in any order. The
members of the order have returned from their various missions, but Rosh never returned,
and Kyle is told to go and seatch for him. as a note about my force powers, I have full
lightning, one point in each heal and mind trick. I intend to max mind trick then force
absorb, then grip then finally maxing heal. Lightning is a great skill to max early, it
makes most storm troopers an ignorable threat. Putting only one point in heal means
that I have to wait between battles to refresh myself since I need to sit and meditate
to heal, however this is sufficent for most parts of the game, and it frees up a few
points for other skills earlier.
Covert Operation

I am given five more missions to choose from and opt for the covert operation. In
this mission Wedge Antillies and I will gang up to capture tibanna gas mine that the
empire has built. I will deploy and set some beacons down on key points, and Wedge will
fly in and bomb the targets, and doing so will allow us to not only disable the imperial
presence there, but leave it well enough intact for the new republic to take over, and
begin to use. The Force point I’m given for this mission is put into mind trick, making
that skill level two.
This mission is basically made up of several large columns with different structures
on them, and the columns are connected by catwalks, making a web of buildings. I land
on a small deck outside the hanger, and am told to place the first beacon on the
deflector shield, so that they can be blown up and disabled. Moving through the floor
of the hanger, I fight a few stormtroopers that are quickly fried as we tussle
underneath the docked TIE-fighters.
There is an elevator that I ride to the top; and an automated turret gun is there
waiting for me that I quickly destroy with a concentrated burst of lightning, and then
make my way outside to the shield generator. There I place the beacon, and Wedge flies
in with his X-Wing fighter, and blows the ever living crap out of the shield generator.
In quick succession he also destroys the hanger bay and garrison after I set beacons on
them.
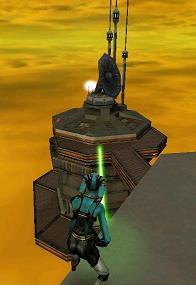
The next target for me to light up is the communications array, and this one is a bit
trickier to get to than the others. The array is only connected to a large central
building by catwalks, and the only path is a level up from me. So I enter the central
building, and, after killing the stormtroopers there, take a set of elevators two floors
up to the top level and smash the windows open and jump out of them. On the outside of
this building, there is a series of small ledges that lead down to the catwalk I need to
get to. I jump back and forth from landing to landing and can then drop to the catwalk
without being hurt from the fall. A short sprint and a few force jumps up the side of
the building later, the array is incapacitated.
The next target is the power relay station, but before I can get over there, a flying
trooper swoops down to try and take me out. Flying troopers are armed with the low
damage, but fast firing imperial repeater rifle, and can dance around the sky to take
shots at you from almost anywhere. They can survive one hard lightsaber hit, meaning
that they are very tough. There are many ways to fight them, the method I usually
employ involves keeping my saber out to deflect their shots towards them, then pulling
them towards me and slashing them with my lightsaber.

To get to the relay station I have to go back to the tall central building and take
the series of lifts that take me a level below the one I started on. And waiting for me
inside on the lowest level is a Sith cultist, he however cannot stand up to my newly
learned strong saber hits, and loses both his hands after challenging me. I then head
out to the relay station, take a long elevator down, plant the beacon, and watch the
fireworks.
The next and final target is the command center for the facility. I ride the
elevator back up and am jumped by some more flying troopers, but cut them down quickly
and fight my way to the base of the command center.
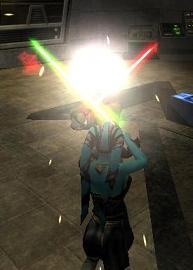
I take an elevator up to the command room, where two officers, two auto turret guns,
and a Sith cultist are waiting for me. After a few well placed bolts of lightning, all
that remains is one turret and the cultist. So I charge in to fight the cultist and we
get a few glancing hits on each other before ending up in a saber lock. I push him out
of the lock with the force after several seconds, and then give him a good surge of
lightning to “warm” him up for some more saber rounds, but the lightning proved to be
enough to finish him off. So I then placed the beacon and vacated the area. If one so
chooses, they can simply run in and place the beacon and run out, and the ensuing bomb
blast will kill everyone left in the command center, but that is not quite as fun.
After the command center is disabled, I receive a message that the remaining
imperials have set up charges on the large gas tanks, to sabotage the facility before
they are driven off, and I am dispatched to disarm the bombs. I head towards the
silo-looking buildings that, as of yet, I haven’t visited. There are stormtroopers and
imperial commandos guarding each of the three bombs, but as before, they are no match
for my lightning, and cannot hurt me because of lightsaber. Once the bombs are
disabled, I head back to the hanger (that has a mammoth hole in the ceiling) and hop
into my ship and call it a day.
Capture Crime Lord
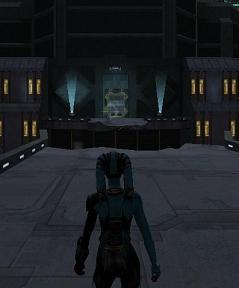
For this mission I am assigned to locate, capture and question a crime lord operating
on Coruscant who has begun selling assassin droids. I land close to his headquarters,
but as I try to cross the bridge to his building, he blows up the bridge. That leaves
me to take the long way around. I am left to scramble across rooftops to get back to
his headquarters. I place my force point into Mind Trick, maxing the skill, and grab a
Tenloss rifle and a DEMP 2 gun for this mission.
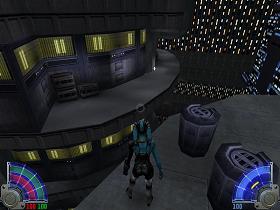
I hop over to a building with a low walkway around the outside and engage the
mercenaries there, slicing them and frying them as it seems me good. A merc with a
Tenloss rifle tries to snipe me from a perch he has on a hovercraft floating a distance
away from my building. Too bad for him, I snipe him first with my own rifle. Using his
craft as a spring board, I jump to the next building where two skiff guards (the guys
that were going to push Luke Skywalker in the pit in the beginning of Return of the
Jedi) armed with bowcasters try their luck against me. They too go down quickly.
a quick note about mercenaries. Mercs can take more hits than stormtroopers and are
armed with a wider variety of weapons than normal trooper groups. Most missions that
have me fighting mercenaries won't have any stormtroopers and vice versa.
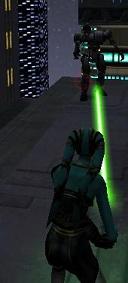
So I traipse to the next rooftop and fight off a few more pesky mercenaries and get
in a tussle with the first assassin droid. Assassin droids have deflector shields built
into them, making them immune to most weapon fire, when their shields are up however,
they cannot fire or move, so they are great targets, but are nearly invincible,
lightning isn’t even able to penetrate their shields. They are, however, particularly
vulnerable to blasts from the DEMP 2 gun, which I happen to have. One shot will drop
their shields, and the next will disable them, making them a pushover, but you have to
have the correct equipment.
After turning that droid into scrap metal, I drop to another building with a speeder
parked on the top, and some more mercenaries sprint out after me. I persuade one of the
mercs to help me take down his friends, and for his help I thank him with a saber toss
that puts him to rest. If I don’t kill the mercenaries before the mind trick wears off,
he will begin to attack me, and the best way to do that is with a saber toss.

A quick elevator ride takes me to a long hallway with a few more mercenaries and
another assassin droid waiting for me. I mind trick another mercenary to split their
attention, fry a few, and again use the DEMP on the droid, and head out to the next
rooftop.
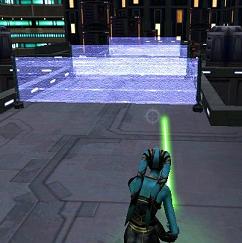
This rooftop has several portable force fields preventing access down the one main
route. Potable force fields can be destroyed by attacking the side barriers, if one is
destroyed the force field will drop and you can walk through. I can also jump over the
force fields, but they will limit my ability to backtrack, which will give me a tactical
disadvantage.
Once all the shields are down, there is a long walkway with many mercenaries. Some I
shocked, and some I sabered, until I came to the edge of the rooftop.
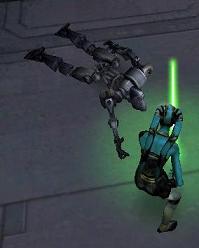 Looking down to the next building there is another assassin droid awaiting me, but this
one hasn’t seen me, so I again grab my DEMP 2 and scrap this one also.
Looking down to the next building there is another assassin droid awaiting me, but this
one hasn’t seen me, so I again grab my DEMP 2 and scrap this one also.
A few more rooftops later I’m at my original destination, the entrance to the crime
lord’s building. Upon entering, a Sith cultist comes after me. He is no match for my
strong saber strikes and is shortly silenced. I recharge my shields and ammunition at
the recharge stations in this room and take the lift to the next level.
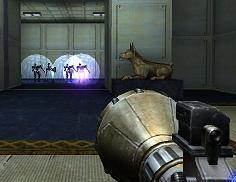
There I spot my target, but as soon as I move, he drops a protective wall around
himself and his desk, and opens a door to another room where four assassin droids are
sitting. If I were a lesser wimp, I would have been worried by this turn of events, but
I just produce my trusty DEMP 2 and put all the droids out of commission. Once that is
done, my target opens his protective wall and I take him into custody.
Meet Contact
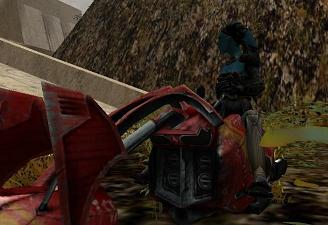
For this mission I have to meet with a man who has information about the Sith
Cultists and a connection with the empire. The man is a few kilometers out of the way,
and I can’t simply fly up in my ship, so I rent a speeder bike to ride out to his
location. Speeder bikes have a gun mounted to the front of them, or I can pull out my
lightsaber and slice bikes or riders that come up close to me. They are difficult to
turn, to make a turn of more than about 30 degrees requires you to pick up and move your
mouse back over to the other side multiple times. The bikes themselves can be
destroyed, or you can be killed while riding, depending on if you or the bike is hit by
blaster fire, and they also have a speed boost. While riding the bike I can’t use any
force powers, but if I hop off I become very vulnerable to being impaled (and instantly
killed) by the fast moving bikes.

Play starts with me hopping on my bike and speeding away, and as soon as the rental
place is out of sight some mercenaries come out of nowhere to bump me off. Some pull
behind me to shoot at me with the bigger gun mounted on the bike, and some pull along
side to shoot at me with blaster rifles. I pull out my lightsaber and dismount some of
the riders with a few quick slashes, and criss-cross back and forth across the valley
that we are riding in to avoid the fire coming from behind me. If I wanted to, I could
stop the bike and let the riders behind me pass and then take shots at them, but I’m so
close to my destination that I just ignore them.
After a few turns through the valley I come to a wall to tall to ride over, so I
force jump off the bike to the top of the wall, only to see what looks like a small home
with my contact waiting outside for me. Feeling confident that I have lost all the
mercenaries, I run up to meet him, but before we can get inside his body is pierced by a
Tenloss rife shot and killed from some far off sniper post. I run inside the building
to avoid a similar fate fill up my shields at the recharge station, and then come out
the other side, to find a selection of bikes waiting for me, and I can hear other bikes
speeding to my position.
So I grab the closest bike and head out, and not a moment to soon, since several
mercenaries approach riding on their bikes. We take off together down the rest of the
valley while I slowly pick them off. We swing around dilapidated buildings, under
bridges, through arched passageways and over ponds. There is one area with some idle
bikes parked, so I switch off my battered bike to a fresh one and after a few more
twists and turns come to a large gap to jump on my bike, all the while fighting off
mercenaries. I eventually make it to a structure, and with all the mercenaries safely
behind me, I can get back to my ship and report my findings to the academy.
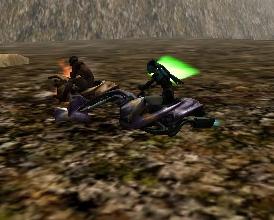
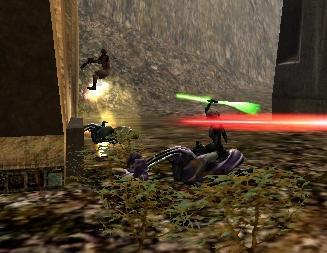
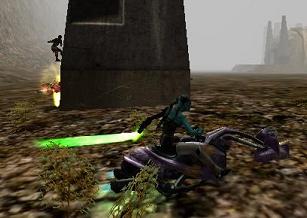
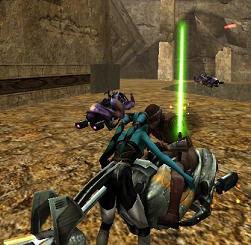
This last area is long, but very linear, so it is easy to find your way through. As
I kill mercenaries, more are in waiting as I pass certain points they will come out to
replenish the ones that fall. I’ve included several pictures, since they will better
show some of the aspects of this level. A video would really be the thing to include at
this portion, but I don’t have the capability/time/patience to make one. I died about
10 times during this mission, and I have included my best death shot.
I placed my force point into Force absorb, but since I only used force jump during
this mission, it never got used.
Cult Investigation
For this mission I am going out to investigate reports of Sith cult activity on a
remote planet. So I plan on heading out, snapping a few pictures of the wildlife and
coming right back, but as we all know, things don’t always go as planned. I put my
force point into absorb, making it level 2.
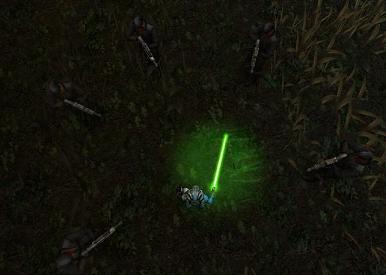
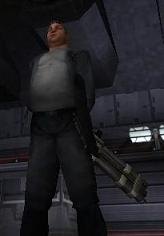
I touch down within the walls of the facility in question, and notice something looks
funny all around me, when all of a sudden five imperial commandos de-cloak around me,
and all of them have Tenloss rifles pointed directly at me. A fat man on a rooftop
orders me to drop all my weapons, so I do so, and am taken into a prison cell. A short
while later, the fat man (apparently the man in charge) comes out and makes me an offer.
He will let me out to see how far I can get, for a little sport. (you know, the way
that deer hunting is a sport) So that is the situation, I have nothing but my wits and
the force against a whole facility of imperials, not even my lightsaber, the fat man has
it. But as a Muppet once said, the force is a powerful ally.
I jump out of my cell, which he has opened for me, and shock the first stormtrooper
that I see and gank his blaster rifle. (I told you it only takes ten seconds to get one
of these) I step outside to see several stormtroopers that have taken up positions to
vainly try and stop my advance, and the fat man is up on a platform above me taking
shots with his concussion rifle. Once all the troopers have been shot or shocked, I
enter the building that they are guarding.
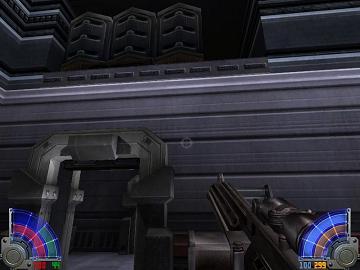
I enter into the middle of a long hallway, to the right a force field blocks the way,
and to the left three trip mines block me off from a trooper and an officer. I choose
to take out the mines first with some lightning and kill the stormtrooper and officer
and take his security key. Next I destroy the force field and reveal an automated
turret gun that I destroy with blaster fire and lightning. There are a series of doors
ahead of me, some locked and some unlocked. Taking the last door on the right side I
pass through a series of rooms that eventually lead me to a large central room with the
magic switch inside. I can tell it’s the magic switch because there are four
stormtroopers guarding it, and it has a pot of coffee next to it. I flip the switch and
unlock all the doors that were previously locked. (before I enter the large central
room there is a raised platform over my head behind me as I enter one of the rooms, this
platform has a few crates and a DEMP 2 gun on it, which is a great find)
After some searching, I find many stormtroopers, but am rewarded with a Tenloss rifle
for my trouble. Eventually I find my way down to the target range with a mounted gun.
I try my hand at the gun just for fun, and then switch off the large force field that
stops all the gun shots, so that I can blow out the wall behind the firing range. I
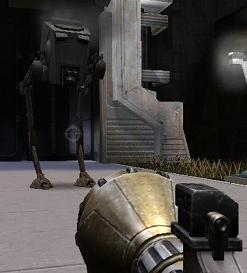
start creeping around out doors until I hear the pitter-patter of walker feet headed in
my direction. I produce my DEMP 2 gun and down the walker in record time. If I didn't
get the DEMP gun, I have a few options, I could try the secondary fire of the repeater
rifle, thermal detonators that I find in the base, or lure it back to the wall that I
blasted down with the mounted gun and shoot it with that gun.

All of the doors that I accessed are locked, but there is a window that I can smash
to get into the walker garage. I kill the officers and troopers guarding the idle
walkers, grab the keys, open the garage door and take one out for a spin. A handful of
troopers have arrived to rain on my walker parade. I can squash them with the feet,
blast them with the main gun, or blow them up with rockets. I opt for the blasting
method since they all are taking cover behind some pillars that prevent me from stepping
on them. I walk out to the grassy courtyard and blast a few rooftop snipers that are
foolish enough to give away their position by firing on the walker. (walkers are
invulnerable to everything but explosions, DEMP guns, and mounted guns) I finish my joy
ride by parking the walker right in the middle of the grassy field and jumping out since
the facility is not conducive to walker rampages, but the last laugh is mine, I locked
the keys inside.
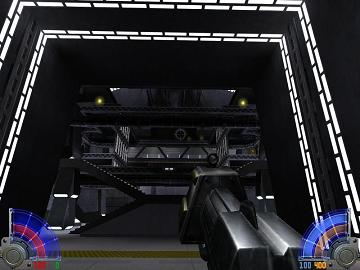
I head back to the garage and take the door to the roof, only to have the fat man
step out on another raised platform and try to kill me with his concussion rifle. Using
force speed I close to a distance where I can land some hits, and he turns tail and
runs, only to sic some more troopers on me that are shocked and thrown from the rooftop.
Coming in from the rooftop leads to some hallways around the aircraft hanger filled
with imperial commandos, troopers and tie pilots which are shortly disposed of. I make
my way to the main hanger floor, and spotting my ship, I enter a large room with many
catwalks that wind above me.
As I enter, the doors close behind me, and fatty tells me that the game ends here,
because I cannot be allowed to escape. He then begins to rain concussion rifle blasts
down on me from far above. I have short time to jump up the catwalks to his level and
get to him before he lands a good shot and kills me. One misstep could be lethal. I
jump up a total of four levels, passing many explosive crates on my way up. Once I get
to his level, he misses with his last shot before I use the force to push him over and
lay into him with the repeater rifle. Eventually the fat man gives up the ghost, and my
lightsaber, and there is nothing left to stop me from getting away and reporting the
secret facility that I found.

This last room can be difficult; to make the shortest path to the top I should start
winding to the left (clockwise) around the room. Several times I passed explosive
crates, and if they get shot they will not only explode, but destroy part of the catwalk
under them, so the path becomes harder to walk. The repeater rifle is the weapon of
choice against the fat man, because you will want to get as close to him as you can. If
you keep your distance he will weave around many of your shots, and light you up with
the concussion rifle, and the blasts can possibly throw you from the top level down to
the floor. If you come to point blank range, he will hesitate to shoot you because it
will damage him as well, and he will have trouble dodging your shots, and you can push
or pull him over, which will stop him, giving you opportunity to blast him with
impunity. Other guns may do more damage with a single shot, but many are less accurate,
the repeater is fast and accurate and will drop him the fastest.
Rescue Mission

This mission involves rescuing a set of negotiators from a Hutt prison/gambling
facility. I put my point in force absorb making it level 3, and take a Tenloss rifle
and repeater rifle. Kyle deploys me into some ventilation shafts and will fly the ship
to transport the captives. So I’m more or less alone on this one.
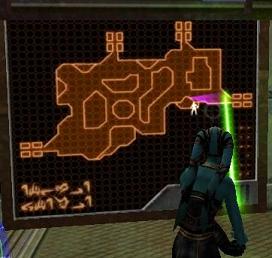
The large pipe I have been deposited in stops abruptly at a vent, which I cut through
with my saber and proceed through. I come to a vent that empties down to a hallway and
eavesdrop on two mercenaries arguing about gambling. I cut their conversation short by
dropping down through the vent and killing them. I advance through the hallways taking
the only path available to me (there is a locked door that I cannot access), shocking
and slicing the mercenaries I come across.
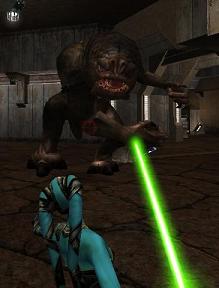
I eventually get to a room with an ominous switch and a map of a room that I haven’t
yet entered. I flip the switch and some windows open up and reveal the mapped room.
The switch also opens prison cells that are holding the negotiators that were captured.
I jump out the now open windows to get to the prisoners, and they tell me in nervous
tones that they want to escape before the rancor gets them all. And on cue, a rancor
emerges in another part of this maze-like room. Fortunately before he can get to us, we
make it to the exit, and I escort the prisoners to the vent that I entered through and
Kyle picks them up. Before the prisoners are whisked away, one of them hands me a key
that will open the locked door I found before.
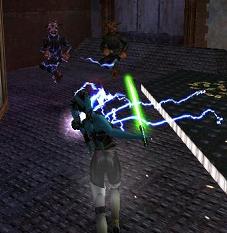
I just rescued 4 of the 16 negotiators from the Hutt. Opening the locked door takes
me down an elevator that takes me to the bar where the mercenaries knock back few cold
ones. I kill them all and continue to a long hallway with three other elevators that
take me up to various other rooms that over look the maze and release prisoners for the
rancor to eat.
I release each set of prisoners, four at a time, and escort them back to the vent,
which is a difficult task since the rancor chases you all over the maze, and when you
return to the elevator new mercenaries return to impede your progress. Once the last
set of prisoners is returned to the vent, I jump back on Kyle’s ship and we cruise back
to the academy.
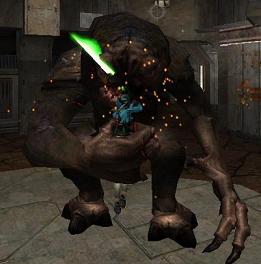
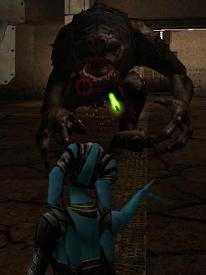
I never died during this mission, but I did let the rancor grab me once for its own
amusement. The rancor is very tough it will take countless saber hits, incessant
gunfire, and all the lightning you can shoot at it. I have heard that you can kill it,
but then another is released that will continue to chase you through the maze.

Kyle and I return to the academy to await our next assignment, and it comes quickly
this time. Luke tells all the academy students and trainers that the cultists are
closer to their unknown but evil purpose (see first paragraph) and that groups will sent
off from the academy in pairs to investigate other locations with a strong force aura to
see if it has been drained. I am paired up with Kyle and we are assigned to investigate
a castle that was once a stronghold of Darth Vader’s.
Up to this point I have never really completed a mission with Kyle; he has left for
the start of missions with me, but conveniently leaves just before the shooting starts,
or flies the ship for various and sundry reasons. But this time we will go in together,
and I will get to see why he is the master. I took a tenloss rifle, a DEMP-2 gun and
thermal detonators; Kyle only used his lightsaber during this mission.
Bast Castle
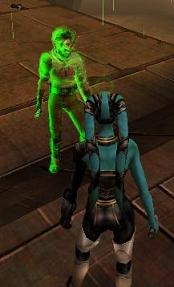
We land the ship far outside the perimeter of the castle and notice that there is a
lovely green, acid rain cloud that has just opened up before us and it will slowly harm
us while we run through it, and Kyle gives the brilliant advice that we should run from
cover to cover to minimize the damage we take from the rain. Kyle, of course, has
mastered the skill of Force Protection, making him nearly immune to the damage from the
rain, where as I, not having the skill, am forced to run as fast as I can from cover to
cover, I use force speed to minimize the damage.
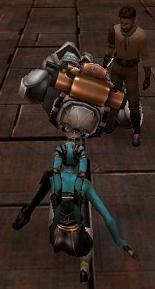
Moving out from under the ship to the first structure, we are greeted by a pair of
super-troopers, these guys are about eight feet tall, half as wide, have armor that is
impervious to small weapon fire, and are armed with concussion rifles. The way that I
take these out is by sprinting up to them and slicing them up with my lightsaber, I
usually take one hit from their rifle before I can kill them. There are perhaps better
ways of doing this, but my method seems to work. These guys can be mind-tricked into
helping you, and then killing them becomes much easier, but you have to be close to mind
trick, so I often just forego that technicality.
a note here about the concussion rifle. This is really the first chance I get to use
one, and they are hardcore. For those of you that remember quake 2, this gun is the BFG
and rail gun rolled up into one because of it's secondary fire. for those of you on
whom that metaphor was wasted, the primary fire of the rifle fires one large purple orb
that explodes on contact, does heavy damage, and throws people considerable distance.
Fighting against the rifle is difficult becasue, not only does it do heavy damage, if
you are on a narrow ledge, you are likely to be thrown off. You can push shots back
with the force, but it requires good reflexes and I can't do it consistantly, but
computer opponents can. Once I'm on the giving end of the gun it can kill several
enemies in one blast, and it great for killing more powerful foes like super troopers
and walkers. The ammunition for it is sparce, once you pick one up (or start with it)
it has full ammo, but it is hard to find more, the best place is ammo recharge boxes,
they will give about 200 units, which is 10 primary shots. the secondary fire shoots a
burst of energy that goes out in a straight line, it does about the same about of damage
as the primary fire, but doesn't have the same blast radius it goes until it hits a
wall, the secondary fire cannot be pushed away with force so it is safe to use on jedi,
although they will still often dodge it, reducing it's effectiveness. The concussion
rifle is nevertheless a powerful, potent weapon.

We come to the entrance to a sprawling building (not the castle yet, not even close)
and pave our way through two more super-troopers then wind our way through the corridors
slicing and frying our way through stormtroopers as we go. Stormtroopers are not even
an issue while we are together; they are killed so quickly and do so little damage, all
they really do just take up our time.
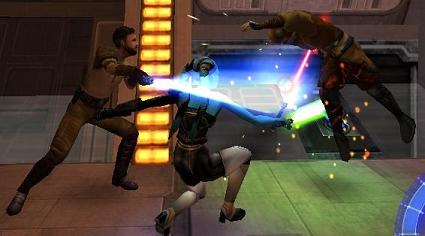
We come to a long hallway and a Sith cultist is waiting for us on the other end.
Kyle and I quickly take him down with a crotch stab. (Keep track at home, this is fatal
crotch stab #1 or FCS1) We then follow the twisting hallways and make our way through
this building, killing stormtroopers as we go. We go on quite happily until we stumble
on some more super-troopers that are guarding the far exit out of the building. This
takes us back outside to a canyon.

Being back outside is nice, but the acid rain is not, fortunately this canyon has
built in overhangs every couple hundred feet to give shelter from the acid rain. As we
pick our way through the canyon, stormtroopers try to block our way, and even some super
troopers and a mounted deck gun. We follow the canyon until we come to another building
on the far side of a bridge. The structure is just a distraction, all the doors are
locked and we can’t break the windows. (dang lightsaber-proof windows!) There is
however, a pathway leading along one side of the rock face that will wind around to
another part of the canyon.
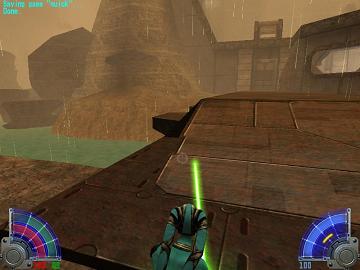
As we approach, two TIE bombers wait for us to pass through the narrow part of the
canyon so they can blast us to smithereens. There is also a complex built into the wall
of the canyon that leads to a landing well above us that has a large mounted deck gun
that would be great for destroying the TIE bombers with. So we decide to head inside
the complex to commandeer the deck gun to allow us to move further down the canyon.
We make our way in to the complex, and are greeted by a few stormtroopers that are
quickly fried, and we barge in. Another super trooper waits for us down a long hall
way, and this one I push over and shock to death. Another room of stormtroopers goes
down quickly after that. Then two Sith Cultists come to rain on our parade, and Kyle
engages them. I come and give one FCS2, and while I’m down, the other one nicks me in
the head with his saber, dropping me from 95 health to 27, so I keep my distance while
Kyle kills him. I heal up before we move on, then we proceed through the fairly empty
complex to the final door before the deck gun.

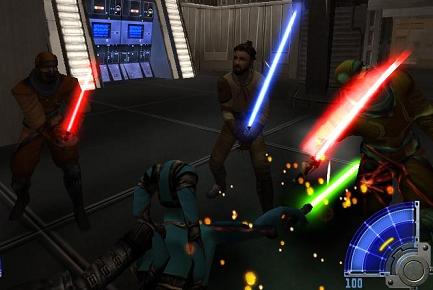
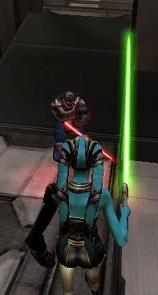
The door to the outside is locked (and once again saber proof), but Kyle thinks he
knows where the switch is, so he heads back to flip it, leaving me to guard the door.
And on cue, a new challenger comes to kill me. A blue suited, masked Sith appears and
produces his red lightsaber and we duel. The game seems to give advantage to players on
lower ground when saber fighting is going on, and he had that lower ground. I utilized
all my tricks on this opponent, and he finally fell to a second full dose of electricity
that tossed him up in the air. I healed up, Kyle opened the door, and the both of us
moved out and took the deck gun and parked the bombers on the canyon floor in lots of
little pieces.
Once the canyon path is clear, we make our way to the entrance to the castle. And
this castle is sprawling, we get inside the ante chamber and there is a parked AT-AT and
several locked doors, and after a few smart remarks from Kyle we find a garbage chute
and slip on down.
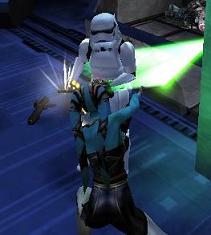
We ride down to an open topped trash compactor, so we hop out and split up. Kyle
takes a very high jump up a vent, and I take a short jump and stumble across some more
stormtroopers, and they are no match for my saber. Rounding some corners I eventually
come back to Kyle duking it out with 3 Sith cultists. One of them turns his attention
to me, and I take him out, but not before Kyle kills the other 2.
We proceed into a room where the floor has flooded, and clumsy Kyle tries to flip a
switch that drops a power conduit into the knee-deep water on the floor, Kyle suspends
the conduit in the air with the Force, but he can’t hold it for ever, and if the conduit
hits the water, it will shock us to death, so I have to find a way to either turn off
the power, or get rid of the water. Along the right wall (from entering the room) there
are a series of pumps, 3 of the pumps are red and are not pumping, so I use my Force
push to start them, they remove all the water and Kyle can lower the conduit onto the
floor, and we walk up the protected side into the extensive air and power system of the
castle.

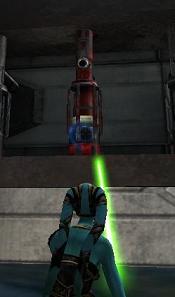

We fight a few century droids and ride some air currents up to the higher levels of
the castle. Eventually we come to a room with catwalks high above us and a doorway that
regularly shoots a green blast of energy through it into the wall, Kyle just hops up to
the catwalks and leaves me to get up to him myself. I can hear stormtroopers chattering
on the other side of the open doorway, so I know they will be waiting for me once I pass
through. With careful timing I slow everything down with my Force speed and sprint the
hallway just after a burst of energy. The hallway opens out to a tall, round room with
intricate machinery in the middle of it, and stormtroopers laying in wait for me, but
they go down quickly.
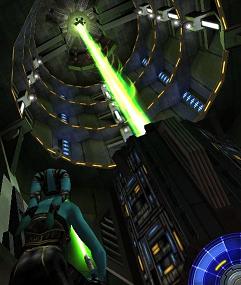
The green bursts that are fired off are from the cross-shaped machine that rotates in
the center of the room, it seems to be powered from a green column of energy dropping
into the top of the machine. I hop on one of the spinning arms and it gives me enough
height to jump to where Kyle is waiting for me. The arms of the machine don’t move
continuously, they remain in position for a few seconds, then all move to the next
position quickly, so I have to time the jump for the few seconds while the arms are
still to jump up.
We come to a hallway off the power room and we fight two Sith cultists, Kyle takes
one, and I get FCS3 on the other. We plow through more stormtroopers and a control room
packed full of more troopers, there we ride an elevator up and come back out to the
power room, and a flying trooper comes out to take pot shots at us. We bounce shots
back at him for a little bit, then I push him into the column of energy and he is
shocked to death and drops to the floor well below us. I hop up to the next higher
level of the room and adjust some mirrors to redirect the energy to overload the … well…
something that causes explosions. The room starts to shake and come apart, and a piece
of the ceiling drops down and breaks the platform that Kyle is standing on, sending him
plummeting down. Once the dust settles I contact him on the communicator, and he tells
me that he is ok, and that I should go on without him, and that he will catch up. So
before heading out, I take an anxious look at the gaping hole in the ceiling into the
busy part of the castle.
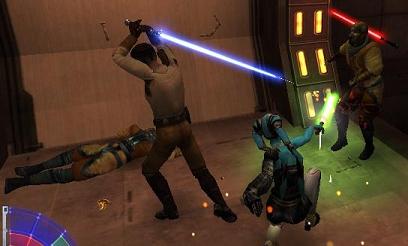
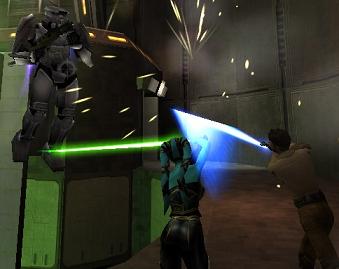
I hope you have enjoyed the second installment of the Jedi Academy battle report.
This is about two-thirds of the way through the castle; the last report will finish our
romp through the castle, and then go through the last 5 missions, then finally show off
the last, long mission. The next report will feature scantily-clad Jedi women,
betrayal, penitence, bounty hunters, cloaking machines, Tie-fighter dog fights,
dangerous creatures, rivers of lava, “choppy mashy crushy things”, lots of saber fights
(complete with gratuitous death shots and FCS), more fried stormtroopers than you could
ever want, and Two Lightsabers (finally!) and even a few more surprises.
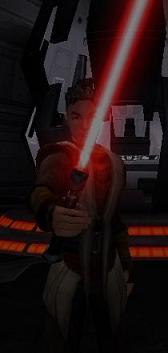

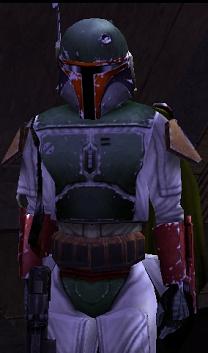
I want to apologize for taking such a long time to get this next part done, I had
planned to get it done before the semester started, but that didn’t happen, so I have to
work on the report piecemeal. There were also other things that were taking up my time;
I’ll link to some of them just for fun.
Brigham Young University
Women
Warcraft 3
Homeworld
The Chronicles of
Narnia
|
 Home
Forum
Starcraft Tournaments
Home
Forum
Starcraft Tournaments

